PARACEL LABS
Summary:
Trapped inside the abandoned underground facility "Paracel LABS", you must find a way to restore power and unlock the exit before it’s too late. As you venture deeper, scattered notes and eerie environments reveal that a creature has escaped containment. With no way to fight back, you must rely on silence and caution to evade a blind but sound-sensitive creature hunting you in the dark.
Goals:
Interior Level & Puzzle Design
High Tension without Combat
Project Breakdown:
Solo 3 Weeks halftime (4hours/day)
Created using Unreal Engine 5.6 and the AGLS template by Jakub W
Marketplace Assets Used:
Creature Animations by Bugrimov Maksim
Key Model by Laoshi
Blockout Assets by Xavier Loux
Blood Decals by Quixel Megascans
Exit Sign Decals from Iconsdb
Monster “Whisper” by Leks
Trailer:
Overview:
Design Breakdown & Walkthrough:
Player Start:
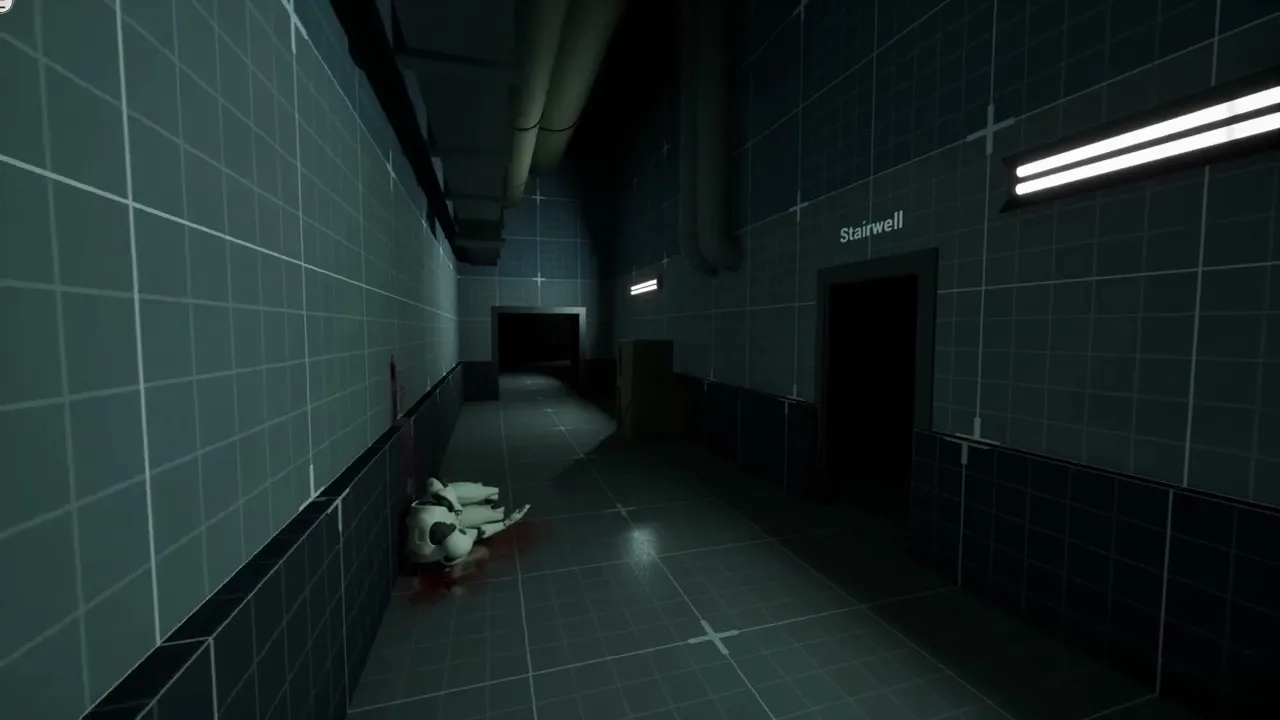
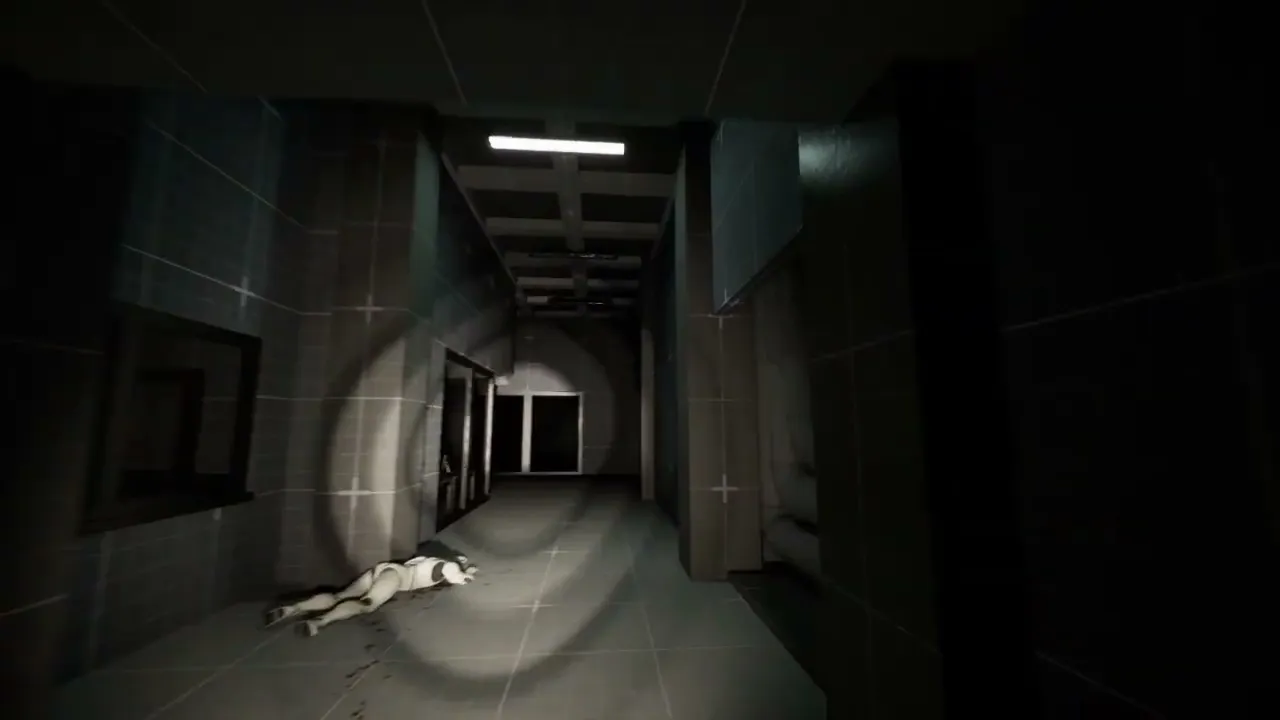
The player begins in a maintenance room, with a hole in the ceiling suggesting their point of entry. Exiting into a dark corridor, they encounter a light switch that reveals a dead scientist and, opposite, a pitch-black stairwell. The player is explicitly prevented from entering this space without a flashlight, planting the idea that it will become accessible later. With no other options available, the player is guided forward down the corridor.
The Exit Corridor:
As the player progresses, exit signs guide them forward, reinforcing direction and importance. They encounter a locked “Door Control” room requiring a padlock key, and further along, the main Exit Door is revealed with an unpowered keypad and a red light indicator.
A yellow wire connects this door back to the locked room, suggesting a power dependency. At the end of the corridor, the player finds another deceased scientist carrying the padlock key, along with a note explaining that the exit required a Blue Keycard and also requires power, and that the necessary fuse is missing.
The Safe Room:
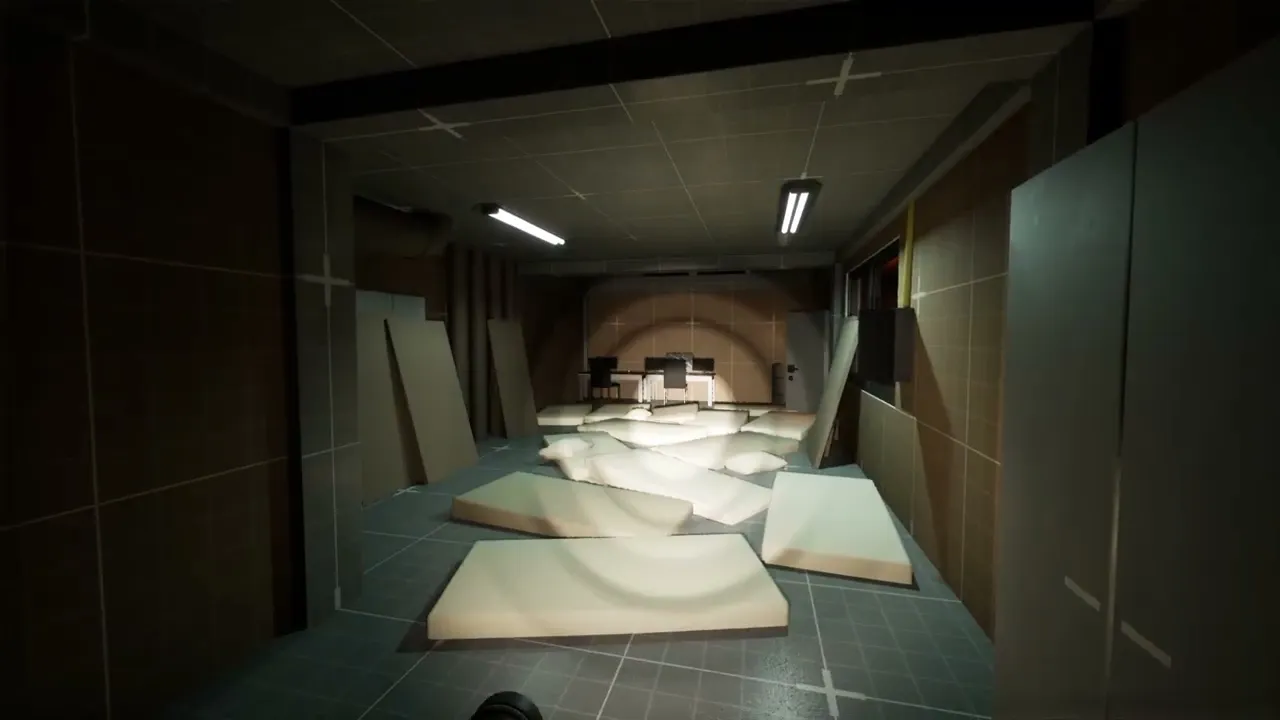
Inside the “Door Control” room, scattered mattresses and a fuse box reinforce the newly unlocked room's function, though a missing fuse prevents progress. The player finds a flashlight and a note explaining that spare fuses have been moved to an upstairs storage area "LABS Storage", prompting the player to recall the previously inaccessible stairwell.
As they leave, a bait & switch reveals another note that explains that the mattresses were placed to soundproof the room, introducing the idea that the monster is blind but sensitive to sound. This establishes the room as a safe hub and prepares the player for the sneak-focused gameplay ahead.
Second Floor LABS:
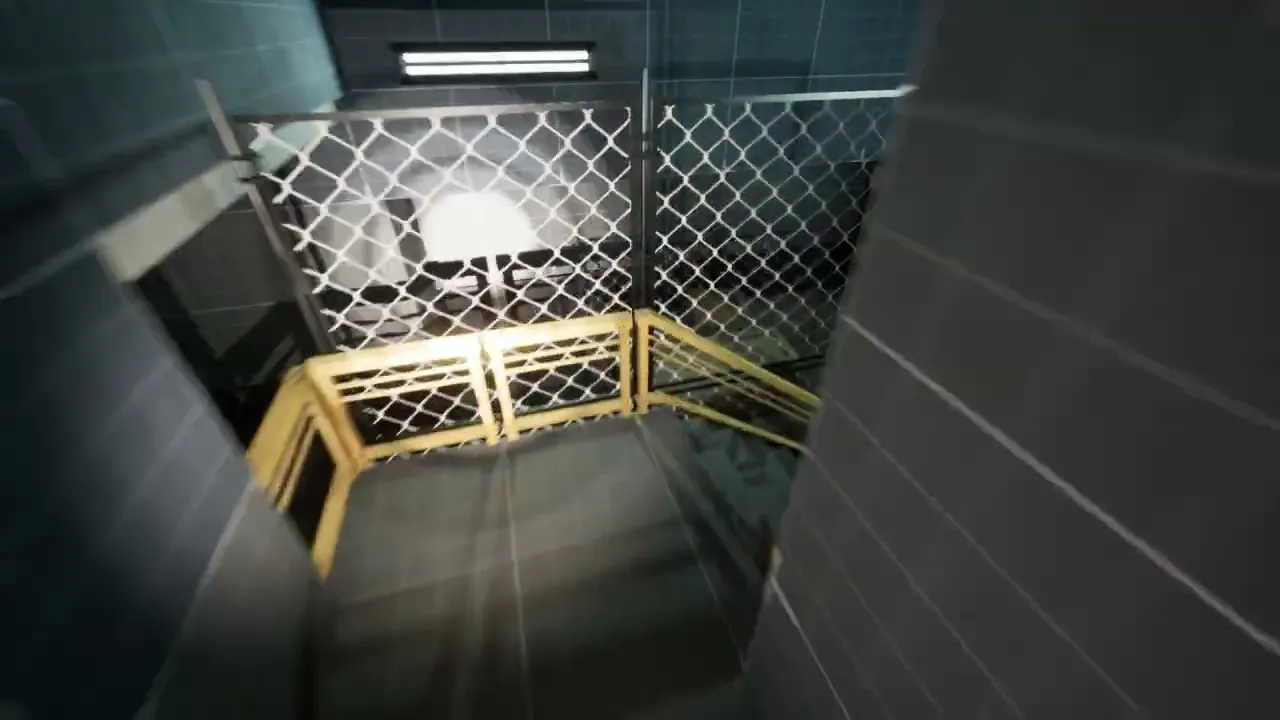
In the stairwell, the player can choose to go up or down. The lower path leads to a locked door that can only be opened from the other side, while the upper path leads into the laboratories.
Another deceased scientist reinforces that something has gone wrong, building tension and hinting at the monster’s presence.
Through nearby windows, the player can spot an ajar door suggesting future exploration.
Farther down the corridor, a test chamber containing the Blue Keycard is found, which is currently inaccessible without a Yellow Keycard.
Locker Room:
Player Start:
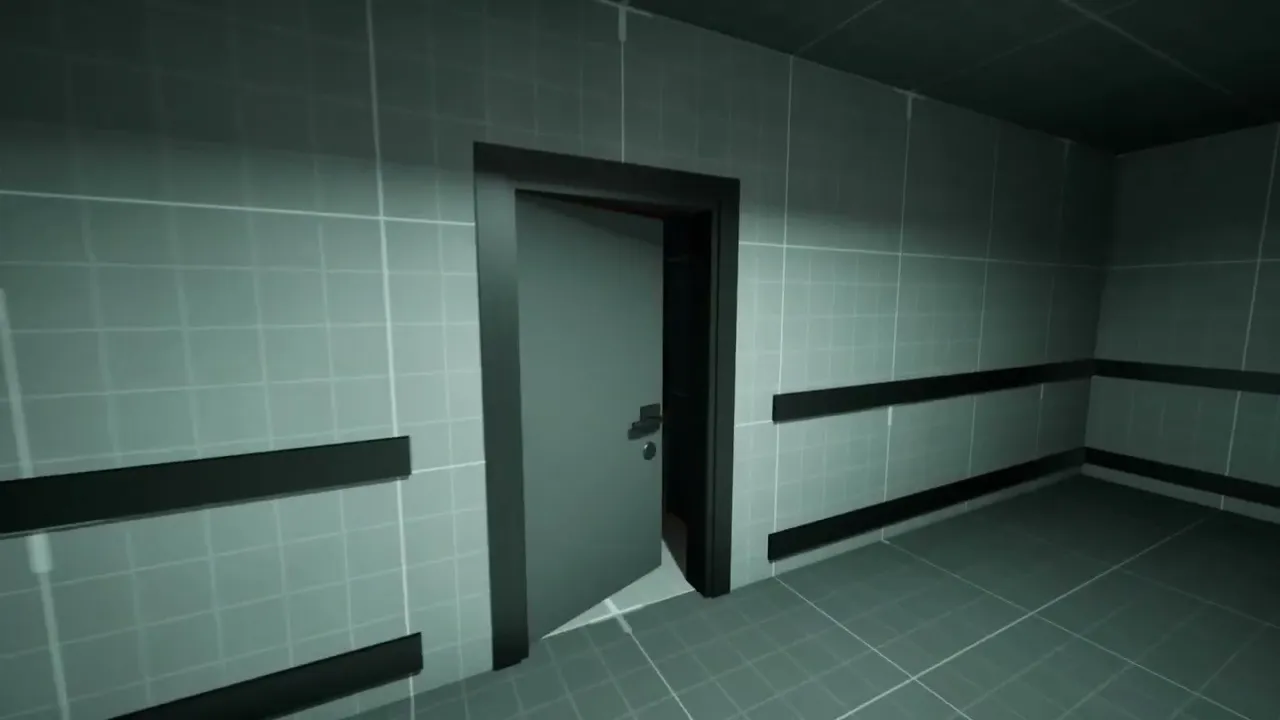
Progressing through the labs, the player reaches a locker room where the previously seen ajar door is now accessible. Inside, a staircase leads down to the basement, allowing the player to unlock the earlier locked door in the stairwell. This creates a level loop, providing a faster route between the labs, the safe room, and the exit.
The player begins in a maintenance room, with a hole in the ceiling suggesting their point of entry. Exiting into a dark corridor, they encounter a light switch that reveals a dead scientist and, opposite, a pitch-black stairwell. The player is explicitly prevented from entering this space without a flashlight, planting the idea that it will become accessible later. With no other options available, the player is guided forward down the corridor.
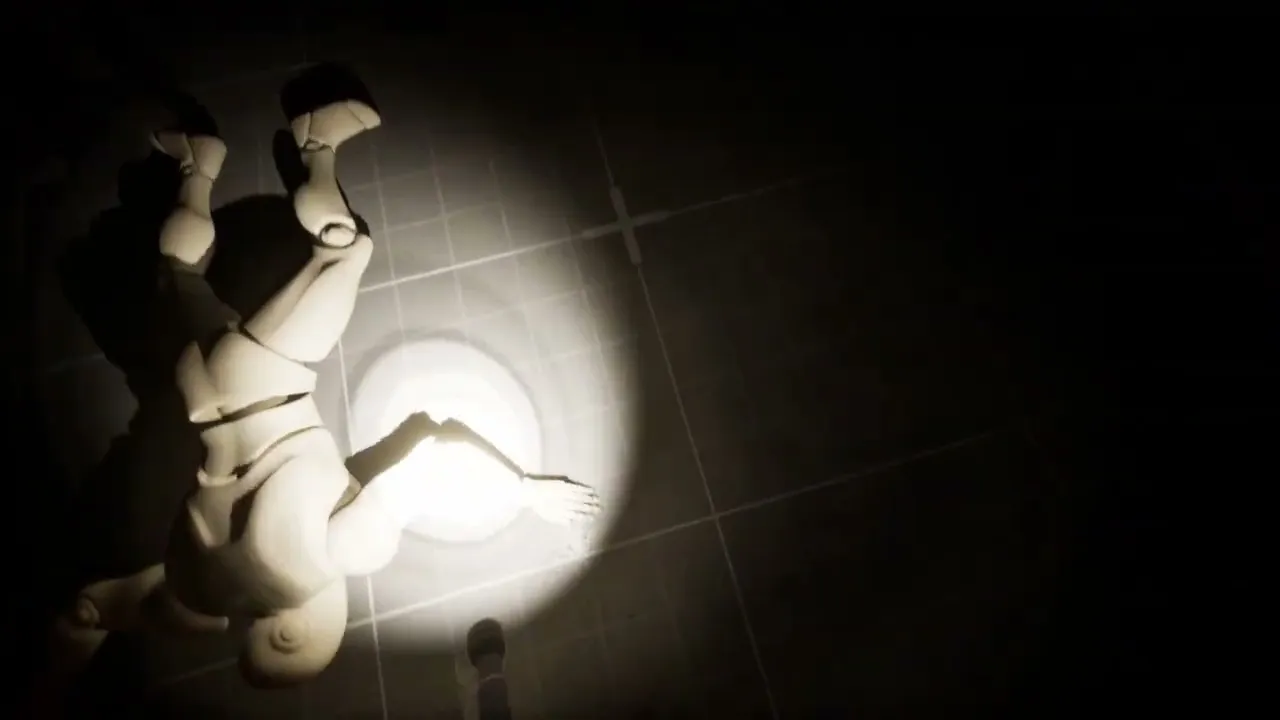
First Monster Encounter:
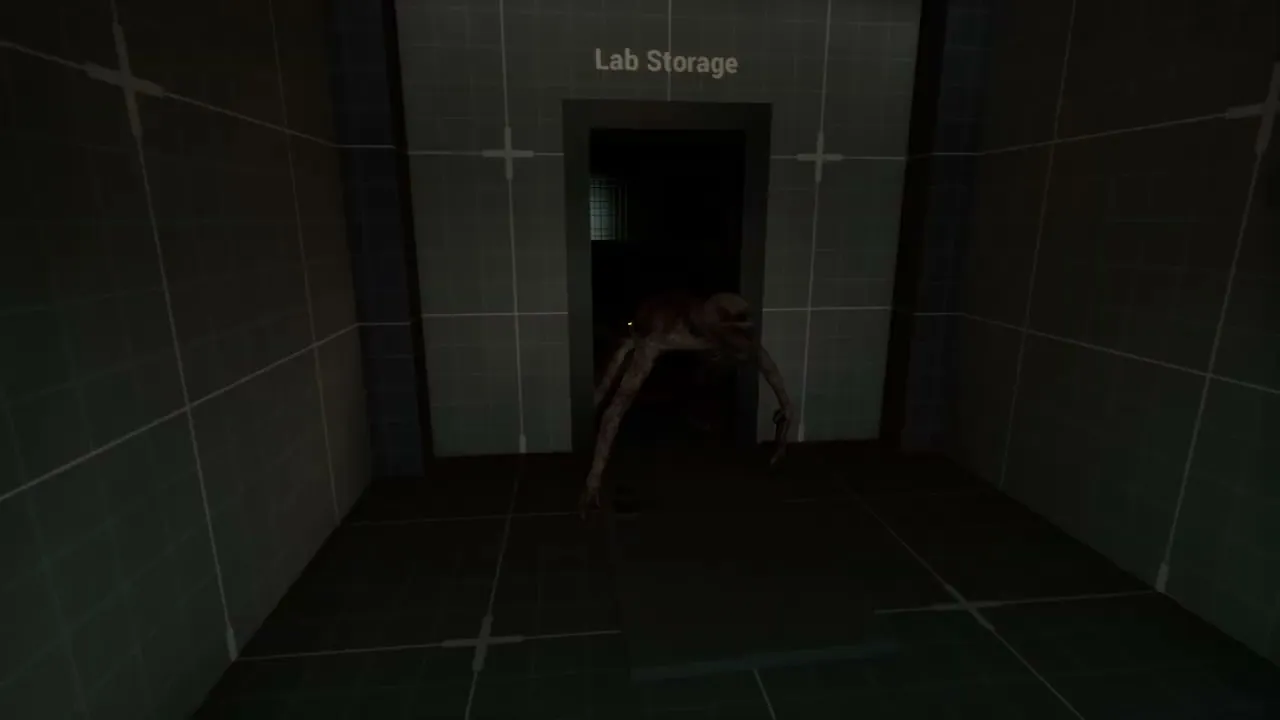
At the LAB Storage entrance, the player triggers a jumpscare as the door bursts open with the body of a deceased scientist holding the Yellow Keycard. As the player reaches for it, a creature’s hand drags the body back into the darkness, revealing the monster for the first time. Slowly backing up, the player accidentally makes noise, prompting the monster to investigate. With no means to fight back, the player must flee, reinforcing the core stealth dynamic and urgency to return to safety.
The Chase:
The player can return to the safe room either by retracing their steps or by using the newly unlocked level loop through the stairwell. During the escape, the monster can be seen closely following the player. However, upon entering the soundproof safe room, it abruptly stops, listens for a bit, and retreats through a hole in the ceiling, confirming the room’s safety.
Heading Back:
Returning to the LAB Storage is tense, with the recent encounter still fresh in the player’s mind. Inside, the player retrieves the Yellow Keycard from the deceased scientist and finds the missing spare fuse in a locker on the wall. A window next to the locker overlooking the safe room clearly communicates where the fuse should be placed, guiding the player’s final objective without explicit instruction.
The Final Stretch:
With the Yellow Keycard, the player can access the test chamber and finally retrieve the Blue Keycard needed to unlock the exit.
Upon leaving, the monster suddenly reappears, forcing the player to flee through the alternate route and loop back toward the safe room. Once inside, they install the fuse, restoring power and turning the exit indicator green, visible through the window next to the fuse box.
However, this action produces noise, and the monster breaches the safe room though another hole in the ceiling, breaking the player’s sense of security and signaling that no space is truly safe anymore. With no refuge left, the player must sprint for the exit. Using the Blue Keycard on the keypad, the Exit Door slowly start to open.
As the player waits for the door to open, the monster pursues across the floor, walls, and ceiling, closing the distance. At the last moment, the player slips under the door and ascends into the light, concluding the experience with a narrow and intense escape!
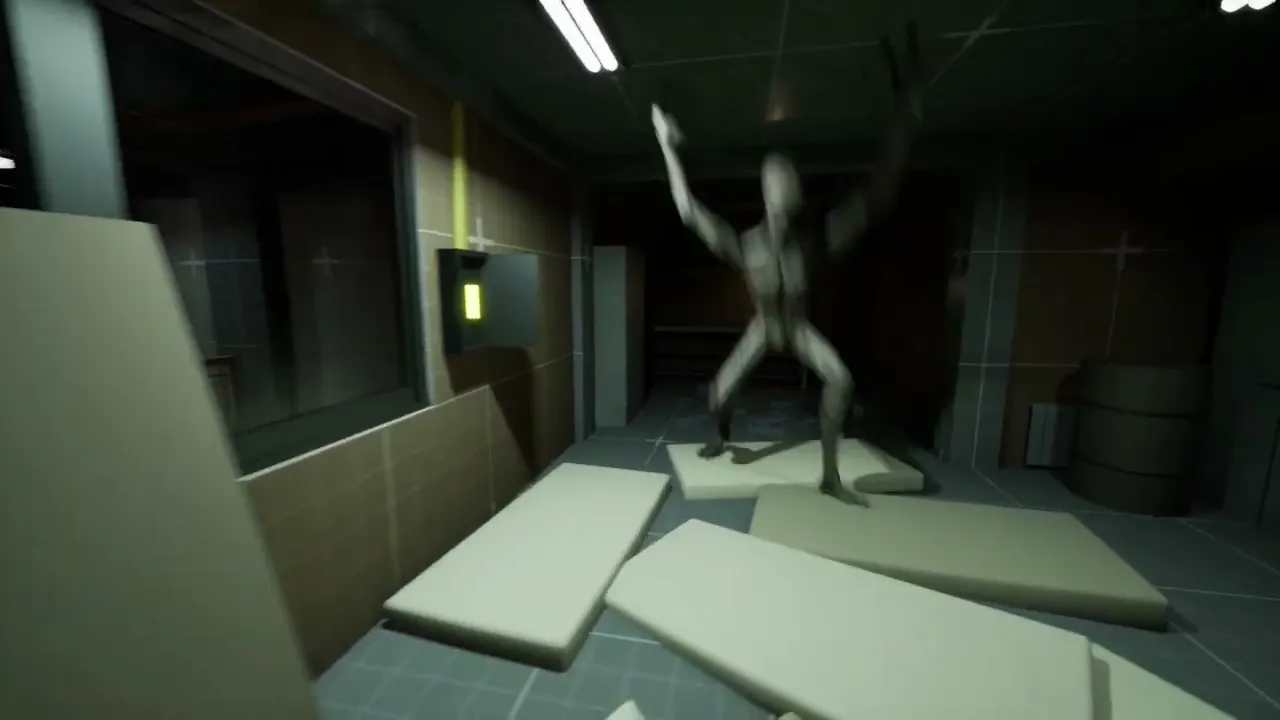
Monster Encounters:
Clues:
The Monster is essential to establishing the level’s tension, pacing, and player engagement.
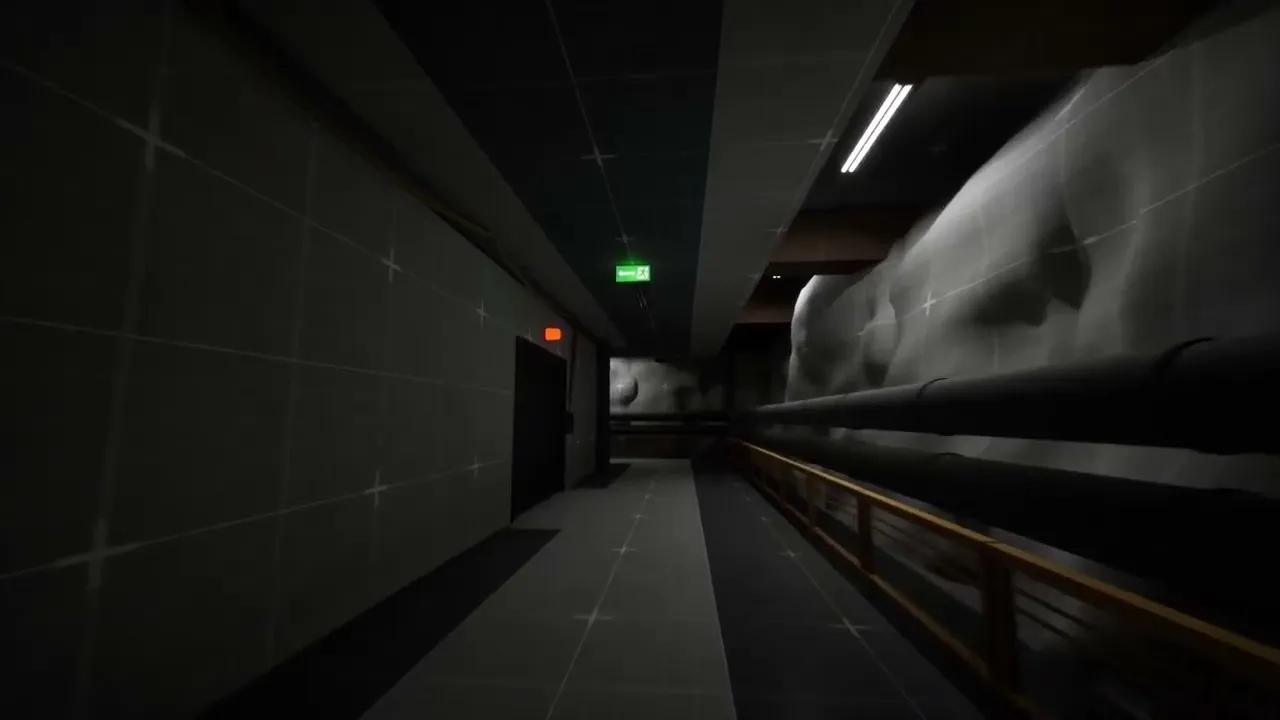
From the beginning, I make sure that the player encounters environmental clues such as deceased scientists, scattered notes, and large holes in the ceilings, hinting at the monster's presensce. With this, I build anticipation early on.
The celing holes are later used by the monster as traversal paths, which further reinforce the monster's unpredictability. I wanted to make the player feel uneasy seeing one of these holes, let alone walk past it, after this traversal mechanic is first introduced.
The player does not come face-to-face with the monster until about midway through the level, when opening the door to the LABS Storage. It triggers the first direct encounter and starts the initial chase sequence.
Chases:
As the level progresses, I carefully stage each monster encounter at first, showing the monster and nudgning the player in the right direction, but let the player decide where to go next in order to create emergent gameplay, where they have to act fast. The decisions the player make in these moments and chases shape their intensity.
The final monster encounter, triggered after installing the fuse, escilates into a high-intensity chase to the exit. This culmination gives a climactic release of the tension that has been steadily built thoughout the level.
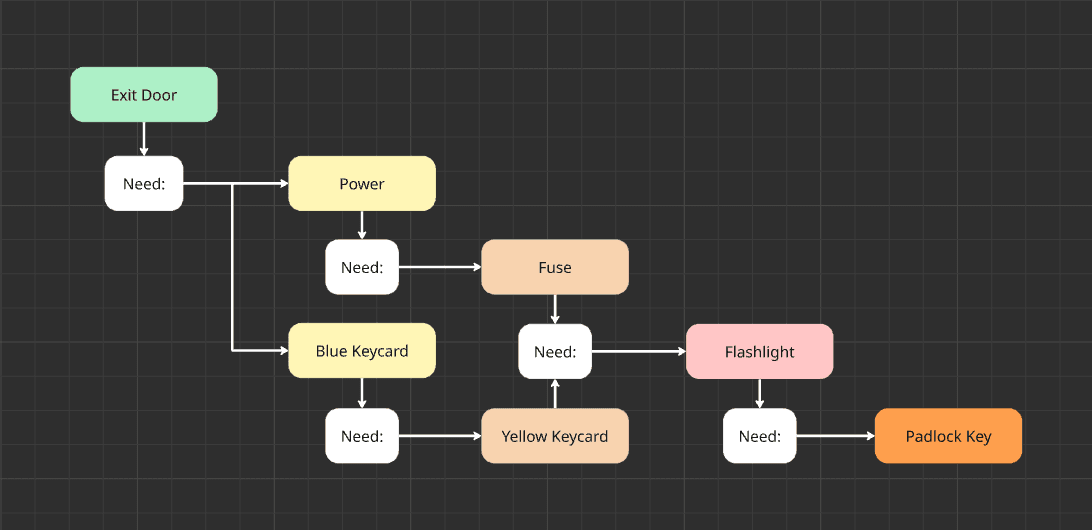
Puzzle Design:
When creating the puzzle for this level, I took much inspiration from the Resident Evil series, particularly Resident Evil Requiem.
I was especially drawn to how progression is built around looping back through the same areas, gradually uncovering clues, and the player having a clear sense of direction without guiding the player explicitly, through waypoints or a minimap.
To better understand this structure, I created flowchart diagrams analyzing the reference game, then developed and iterated on my own flowcharts base on the gameplay elements I wanted to emphasize.
In my level, I ensure the player awlays knows what their next goal is through the use of implicit design and the core ideas used in my reference. I also wanted to introduce unpredictability though the monster's precens, forcing the player to adapt their path and decisions as they navigate the puzzle.

Process:
Brainstorming:
When I first began brainstorming this experience, I set a few clear goals: to focus on interior level design and to maintain high tension without the use of combat. The initial concept centered around an urban explorer documenting an abandoned factory with a GoPro camera, only to become trapped inside with a monster in the shadows. Over time, this evolved into an escape scenario set within a laboratory facility, as the setting felt more believable for the monster and better aligned with my own interests and creativity. This direction was also very much influenced by my love for the Half-Life series and the Resident Evil series, both of which helped set the tone and structure of the level.
As mentioned in the Puzzle Design section, a key objective for me was to create a sense of forward momentum through implicit guidance. I wanted the player to consistently understand where to go next without explicit instructions, using environmental cues, exploration, and process of elimination. A strong reference for this approach was Resident Evil Requiem, particularly its opening sections. These principles help me combine clear progression with uncertainty introduced by the monster’s presence.
Gathering References
Setting up the location was fun and Pinterest had my back in providing a multitude of good references for environments that matched my vision.
I used Miro Board as the place for all my reference pictures, flowchart iterations, sketches and screenshots of my blockouts, which made saving and accessing references, both when working on this piece or on the fly, very easy.

Paper Design
I have always loved sketching little maps and layouts of underground facilities and substructures, so developing the initial floor plan for this level came quite naturally. With the flowchart already established, I could use it as a foundation to guide the placement, pacing, and relationships between rooms, corridors, and key items. Almost like using a subway map to come up with a city layout, which was both a new and enjoyable approach for me.
The layout I drew on paper continued to evolve during the in-engine blockout phase. Several changes were made to better support the gameplay, pacing, and navigation, especially after shifting from the urban explorer concept to the final laboratory setting. The iterations made helped the spatial design better align with the final laboratory “science gone wrong” theme.


Blockout
During the initial blockout, I kept grid snapping set to 100 units in Unreal Engine, equivalent to one meter, which helped me focus on the metrics from the start. I also kept the grid material applied to floors, walls, and ceilings to make the metrics as readable for myself as possible throughout the whole blockout process.
The first pass was intentionally rough, enabling me to reach a Minimum Viable Product of the level quickly. Once the full experience was playable from start to finish, with all the scripting and layout in place, I started working on the mood and visual identity of each area. Since interior spaces can easily become disorienting, I made sure that each area had distinct visual characteristics to support navigation. For example, the corridor between the stairwell and the safe room features a flickering light and a wall marked with “Paracel LABS”, working as a point of reference for the player.


Full Playthrough:
Full Playthrough:
Reflections
ReflectionsReflectionsReflectionsReflectionsReflectionsReflectionsReflectionsReflectionsReflectionsReflectionsReflectionsReflectionsReflectionsReflectionsReflectionsReflectionsReflectionsReflectionsReflectionsReflectionsReflectionsReflectionsReflectionsReflectionsReflectionsReflectionsReflectionsReflectionsReflectionsReflectionsReflectionsReflectionsReflectionsReflectionsReflectionsReflectionsReflectionsReflectionsReflectionsReflectionsReflectionsReflectionsReflectionsReflectionsReflectionsReflectionsReflectionsReflectionsReflectionsReflectionsReflectionsReflectionsReflectionsReflectionsReflectionsReflectionsReflectionsReflectionsReflectionsReflectionsReflectionsReflectionsReflectionsReflectionsReflectionsReflectionsReflectionsReflectionsReflectionsReflectionsReflectionsReflectionsReflectionsReflectionsReflectionsReflectionsReflectionsReflectionsReflectionsReflectionsReflectionsReflectionsReflectionsReflectionsReflectionsReflectionsReflectionsReflectionsReflectionsReflectionsReflectionsReflectionsReflectionsReflectionsReflectionsReflectionsReflectionsReflectionsReflectionsReflectionsReflectionsReflectionsReflectionsReflectionsReflectionsReflectionsReflectionsReflectionsReflectionsReflectionsReflectionsReflectionsReflectionsReflectionsReflectionsReflectionsReflectionsReflectionsReflectionsReflectionsReflectionsReflectionsReflectionsReflectionsReflectionsReflectionsReflectionsReflectionsReflectionsReflectionsReflectionsReflectionsReflections
Design Breakdown & Walkthrough:
Trailer:
Overview:
Monster Encounters:
The Exit Corridor:
As the player progresses, exit signs guide them forward, reinforcing direction and importance. They encounter a locked “Door Control” room requiring a padlock key, and further along, the main Exit Door is revealed with an unpowered keypad and a red light indicator.
A yellow wire connects this door back to the locked room, suggesting a power dependency. At the end of the corridor, the player finds another deceased scientist carrying the padlock key, along with a note explaining that the exit required a Blue Keycard and also requires power, and that the necessary fuse is missing.
The Safe Room:
Inside the “Door Control” room, scattered mattresses and a fuse box reinforce the newly unlocked room's function, though a missing fuse prevents progress. The player finds a flashlight and a note explaining that spare fuses have been moved to an upstairs storage area "LABS Storage", prompting the player to recall the previously inaccessible stairwell.
As they leave, a bait & switch reveals another note that explains that the mattresses were placed to soundproof the room, introducing the idea that the monster is blind but sensitive to sound. This establishes the room as a safe hub and prepares the player for the sneak-focused gameplay ahead.
Second Floor LABS:
In the stairwell, the player can choose to go up or down. The lower path leads to a locked door that can only be opened from the other side, while the upper path leads into the laboratories.
Another deceased scientist reinforces that something has gone wrong, building tension and hinting at the monster’s presence.
Through nearby windows, the player can spot an ajar door suggesting future exploration.
Farther down the corridor, a test chamber containing the Blue Keycard is found, which is currently inaccessible without a Yellow Keycard.
Locker Room:
Progressing through the labs, the player reaches a locker room where the previously seen ajar door is now accessible. Inside, a staircase leads down to the basement, allowing the player to unlock the earlier locked door in the stairwell. This creates a level loop, providing a faster route between the labs, the safe room, and the exit.
First Monster Encounter
At the LAB Storage entrance, the player triggers a jumpscare as the door bursts open with the body of a deceased scientist holding the Yellow Keycard. As the player reaches for it, a creature’s hand drags the body back into the darkness, revealing the monster for the first time. Slowly backing up, the player accidentally makes noise, prompting the monster to investigate. With no means to fight back, the player must flee, reinforcing the core stealth dynamic and urgency to return to safety.
The Chase:
The player can return to the safe room either by retracing their steps or by using the newly unlocked level loop through the stairwell. During the escape, the monster can be seen closely following the player. However, upon entering the soundproof safe room, it abruptly stops, listens for a bit, and retreats through a hole in the ceiling, confirming the room’s safety.
Clues:
The Monster is essential to establishing the level’s tension, pacing, and player engagement.
From the beginning, I make sure that the player encounters environmental clues such as deceased scientists, scattered notes, and large holes in the ceilings, hinting at the monster's presensce. With this, I build anticipation early on.
The celing holes are later used by the monster as traversal paths, which further reinforce the monster's unpredictability. I wanted to make the player feel uneasy seeing one of these holes, let alone walk past it, after this traversal mechanic is first introduced.
The player does not come face-to-face with the monster until about midway through the level, when opening the door to the LABS Storage. It triggers the first direct encounter and starts the initial chase sequence.
Heading Back:
Returning to the LAB Storage is tense, with the recent encounter still fresh in the player’s mind. Inside, the player retrieves the Yellow Keycard from the deceased scientist and finds the missing spare fuse in a locker on the wall. A window next to the locker overlooking the safe room clearly communicates where the fuse should be placed, guiding the player’s final objective without explicit instruction.
Puzzle Design:
Process:
X:
When creating the puzzle for this level, I took much inspiration from the Resident Evil series, particularly Resident Evil Requiem.
I was especially drawn to how progression is built around looping back through the same areas, gradually uncovering clues, and the player having a clear sense of direction without guiding the player explicitly, through waypoints or a minimap.
To better understand this structure, I created flowchart diagrams analyzing the reference game, then developed and iterated on my own flowcharts base on the gameplay elements I wanted to emphasize.
In my level, I ensure the player awlays knows what their next goal is through the use of implicit design and the core ideas used in my reference. I also wanted to introduce unpredictability though the monster's precens, forcing the player to adapt their path and decisions as they navigate the puzzle.
The Final Stretch:
With the Yellow Keycard, the player can access the test chamber and finally retrieve the Blue Keycard needed to unlock the exit.
Upon leaving, the monster suddenly reappears, forcing the player to flee through the alternate route and loop back toward the safe room. Once inside, they install the fuse, restoring power and turning the exit indicator green, visible through the window next to the fuse box.
However, this action produces noise, and the monster breaches the safe room though another hole in the ceiling, breaking the player’s sense of security and signaling that no space is truly safe anymore. With no refuge left, the player must sprint for the exit. Using the Blue Keycard on the keypad, the Exit Door slowly start to open.
As the player waits for the door to open, the monster pursues across the floor, walls, and ceiling, closing the distance. At the last moment, the player slips under the door and ascends into the light, concluding the experience with a narrow and intense escape!
Chases:
As the level progresses, I carefully stage each monster encounter at first, showing the monster and nudgning the player in the right direction, but let the player decide where to go next in order to create emergent gameplay, where they have to act fast. The decisions the player make in these moments and chases shape their intensity.
The final monster encounter, triggered after installing the fuse, escilates into a high-intensity chase to the exit. This culmination gives a climactic release of the tension that has been steadily built thoughout the level.
Brainstorming:
When I first began brainstorming this experience, I set a few clear goals: to focus on interior level design and to maintain high tension without the use of combat. The initial concept centered around an urban explorer documenting an abandoned factory with a GoPro camera, only to become trapped inside with a monster in the shadows. Over time, this evolved into an escape scenario set within a laboratory facility, as the setting felt more believable for the monster and better aligned with my own interests and creativity. This direction was also very much influenced by my love for the Half-Life series and the Resident Evil series, both of which helped set the tone and structure of the level.
As mentioned in the Puzzle Design section, a key objective for me was to create a sense of forward momentum through implicit guidance. I wanted the player to consistently understand where to go next without explicit instructions, using environmental cues, exploration, and process of elimination. A strong reference for this approach was Resident Evil Requiem, particularly its opening sections. These principles help me combine clear progression with uncertainty introduced by the monster’s presence.
Full Playthrough:
Gathering References:
Setting up the location was fun and Pinterest had my back in providing a multitude of good references for environments that matched my vision.
I used Miro Board as the place for all my reference pictures, flowchart iterations, sketches and screenshots of my blockouts, which made saving and accessing references, both when working on this piece or on the fly, very easy.
Paper Design:
I have always loved sketching little maps and layouts of underground facilities and substructures, so developing the initial floor plan for this level came quite naturally. With the flowchart already established, I could use it as a foundation to guide the placement, pacing, and relationships between rooms, corridors, and key items. Almost like using a subway map to come up with a city layout, which was both a new and enjoyable approach for me.
The layout I drew on paper continued to evolve during the in-engine blockout phase. Several changes were made to better support the gameplay, pacing, and navigation, especially after shifting from the urban explorer concept to the final laboratory setting. The iterations made helped the spatial design better align with the final laboratory “science gone wrong” theme.
Blockout:
During the initial blockout, I kept grid snapping set to 100 units in Unreal Engine, equivalent to one meter, which helped me focus on the metrics from the start. I also kept the grid material applied to floors, walls, and ceilings to make the metrics as readable for myself as possible throughout the whole blockout process.
The first pass was intentionally rough, enabling me to reach a Minimum Viable Product of the level quickly. Once the full experience was playable from start to finish, with all the scripting and layout in place, I started working on the mood and visual identity of each area. Since interior spaces can easily become disorienting, I made sure that each area had distinct visual characteristics to support navigation. For example, the corridor between the stairwell and the safe room features a flickering light and a wall marked with “Paracel LABS”, working as a point of reference for the player.
Reflections:
ReflectionsReflectionsReflectionsReflectionsReflectionsReflectionsReflectionsReflectionsReflectionsReflectionsReflectionsReflectionsReflectionsReflectionsReflectionsReflectionsReflectionsReflectionsReflectionsReflectionsReflectionsReflectionsReflectionsReflectionsReflectionsReflectionsReflectionsReflectionsReflectionsReflectionsReflectionsReflectionsReflectionsReflectionsReflectionsReflectionsReflectionsReflectionsReflectionsReflectionsReflectionsReflectionsReflectionsReflectionsReflectionsReflectionsReflectionsReflectionsReflectionsReflectionsReflectionsReflectionsReflectionsReflectionsReflectionsReflectionsReflectionsReflectionsReflectionsReflectionsReflectionsReflectionsReflectionsReflectionsReflectionsReflectionsReflectionsReflectionsReflectionsReflectionsReflectionsReflectionsReflectionsReflectionsReflectionsReflectionsReflectionsReflectionsReflectionsReflectionsReflectionsReflectionsReflectionsReflectionsReflectionsReflectionsReflectionsReflectionsReflectionsReflectionsReflectionsReflectionsReflectionsReflectionsReflectionsReflectionsReflectionsReflectionsReflectionsReflectionsReflectionsReflectionsReflectionsReflectionsReflectionsReflectionsReflectionsReflectionsReflectionsReflectionsReflectionsReflectionsReflectionsReflectionsReflectionsReflectionsReflectionsReflectionsReflectionsReflectionsReflectionsReflectionsReflectionsReflectionsReflectionsReflectionsReflectionsReflectionsReflectionsReflectionsReflectionsReflectionsReflections